
Hello Everyone and welcome to the first month of the Save the Bees BOM. Jacquelynne Steves has designed another fabulous free block of the month this year. If you want to join in and haven’t signed up yet, visit Jacquelynne here. Jacquelynne emails the instructions out on the first Monday of the month.

 There are also awesome sponsors each month and each featured blogger will have a giveaway winner. This month, the sponsor is Martingale and the prize is a copy of the first Splendid Sampler book.
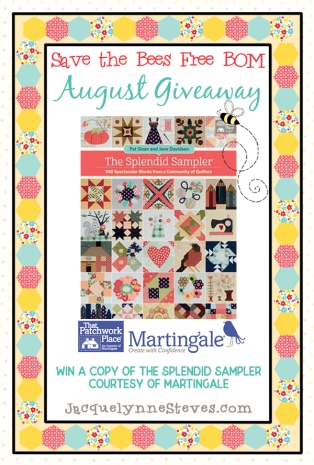 If you were unable to complete all the blocks last year or only downloaded a few of the blocks when they were available, this book has them all! Read to the end of this post to see how you can have a chance to win this book.
My special challenge to you:
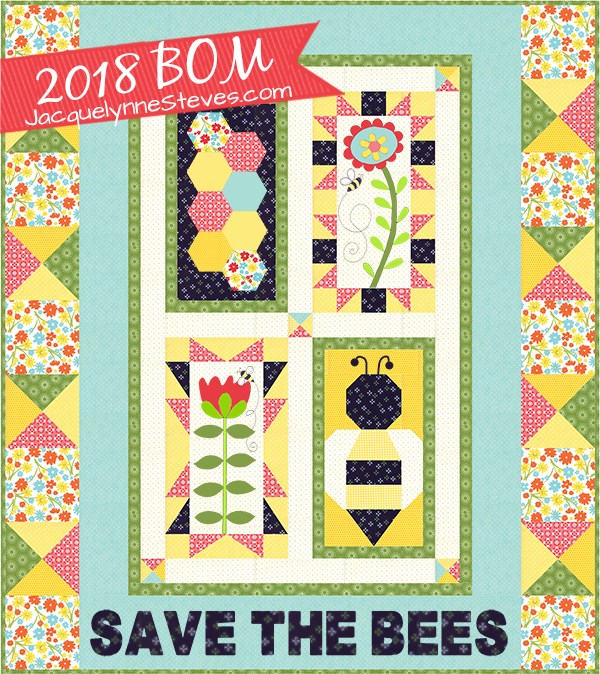
For my regular followers, you know I like to make mini quilts. Well, I made my Save the Bees quilt half the size of the original. That means my blocks finish at 5″ x 9″ instead of 10″ x 18″ and the overall size of my mini quilt is 24 1/2″ x 27″. I have written out all of my notes for the fabric amounts, cutting instructions and block instructions for the smaller quilt. I will post them on my Save the Bees page each month in the Header line under the Header picture above. I hope some of you will take the challenge and make the smaller version of this quilt. Sherri, A Quilting Life, will also be making a mini version.

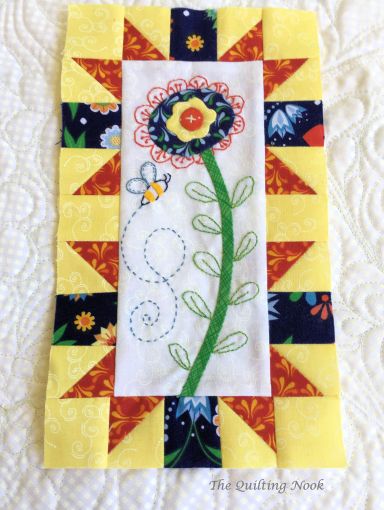
This is my test bee block 4. There are some small pieces in this block, but I will give you hints about working with these pieces as we go. But this is my number 1 hint for working with small pieces: starch your fabric before cutting. You can find many different ways to do it on the internet. I use Best Press to wet the fabric, then wait a few minutes to press. I also press from both sides to help dry it.
The fabric requirements and cutting instructions for the mini can be found here and on the Save the Bees page.

I started with this fat quarter bundle from Connecting Threads called Midsummer Meadow and added in a couple of yardage pieces. I still have most of this fabric left. Another advantage of making a mini, less fabric!

What attracted me to this fabric was the main print. I started making Save the Bees (STB), early last spring and it reminded me of a summer garden with bees all around. It also has what I call very preppy colors (for those of you who remember them from the late 70’s, early 80’s).
Now for Block 1
You can find the revised mini instructions for Block 1 here, but you must also have the original instructions from Jacquelynne. I’ve only written out the changes with no diagrams. If you choose to make the mini, I would suggest that you take the revised numbers and transfer them to the original instructions. If you have questions about the mini, contact me and I can help you out.

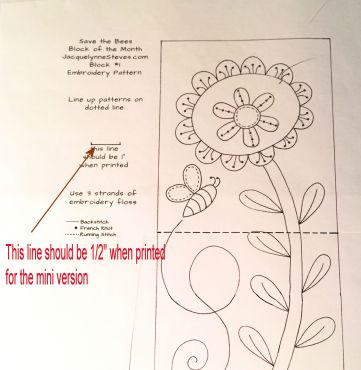
When you print the applique and embroidery designs from the original instructions, set your printer scale to 50% to get the correct size. The embroidery design is on two pages so you will need to tape them together and the measurement line should be 1/2″ instead of 1″.
I have really come to enjoy combining applique and embroidery, especially working with smaller pieces. In block 1, I embroidered the leaves and bee because of their size, but also embroidered the outside section of the flower.

I mostly used Aurifloss by Aurifil (one of our sponsors). Because I’m working with smaller pieces, I used two strands of floss instead of three.
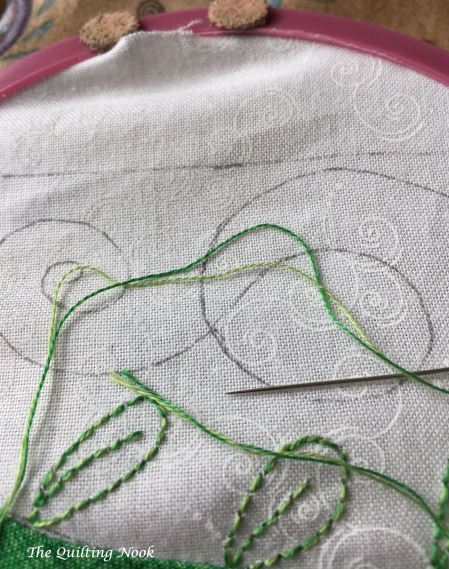
I worked on the applique and embroidery on an airplane trip to California in March. I took all my flosses that I thought I was going to use. When I starting working on the leaves, I thought the green was too dark. Since I only had a limited number of floss with me, I combined one green strand and one yellow strand to get the color I wanted, something I learned from cross-stitching.
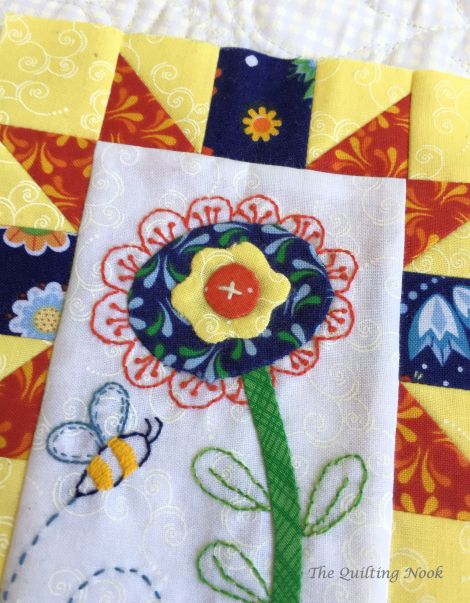
I hand appliqued, using the needle turn method. I also made bias strips for the stems. The piecing in this block was simple, but again, starch your fabrics to make them easier to work with. I do not starch my embroidery and applique backgrounds, though.
Now for the Giveaway
This giveaway is opened to everyone. US winners will receive a print copy and Canadian and International winners will receive a digital copy. For your chance to win The Splendid Sampler book from Martingale, leave a comment in the comment area (below my name at the bottom of this post) telling me the smallest size quilt that you’ve made. Make sure that you leave your email so I can contact you if you win. You have until the end of day on Sunday, August 12 to leave your comment. Make sure you visit the other bloggers for 7 more chances to win and to see how everyone finished their Block 1.
- The Crafty Quilter
- Podunk Pretties
- The Quilting Nook
- The Sewing Loft
- Flamingo Toes
- Kathy’s Quilts
- Freemotion by the River
- A Quilting Life
Post your finished blocks on social media using:
#SaveTheBeesQuilt and #SaveTheBeesBOM
You can post pictures on the Sew Quilty Friends FB group at https://www.facebook.com/groups/SewQuiltyFriends.JacquelynneSteves/.
Also, be sure to visit Jacqulynne’s post on Block 1 for tips and information about Block 1.
I hope you will take my challenge and make a smaller version of Save The Bees with me. Don’t forget to leave a comment below about the smallest quilt you’ve made for your chance to win the Splendid Sampler book.
Thanks for stopping by!


My smallest quilt was a doll quilt when I was very young. My grandma taught me how to sew by hand by making it.
LikeLike
My smallest quilt is a 12 x 12 inch panel
LikeLike
My smallest size was a 5×5 quilted potholder.
LikeLike
I don’t like making small quilts as I don’t like working with small peices. Two inch pieces are about the smallest
LikeLike
My smallest quilt is a wall hanging that is 10″ x 15″ and is done in wool applique.
LikeLike
My smallest quilt was my first one when I was in Girl Scout in second grade. It is a sampler block cradle quilt that we embroidered our names on the blocks we made. I still have it today.
LikeLike
I like combining applique and embroidery, too … I even like to throw wool in the mix! Your block is darling. Minis are my favorite — my hubby and I fulltime RV, so small is where it’s at! I make a lot of minis for decorating (I’m a seasonal kind of gal) and it’s a lot easier to change decor than furniture in an RV. The smallest piece I’ve made was 4″ by 10″ … for a mini stand I have. It’s super cute! 🙂
LikeLike
I think my smallest quilt was a crib quilt for my grand daughter
LikeLike
The smallest quilt I’ve made is about 11″ x 13″ and it hangs on my sewing room wall.
LikeLike
My smallest is 4 1/2 inch square for my tea cup while I’m sewing!
LikeLike
like
LikeLike
My smallest was a 2″ X 4″ for my grandaughters dollhouse.
LikeLike
I am so excited to make the mini version of Save the Bees!!! Thankyou so much for the mini version!
I will have to find a fabric line for this! Time to shop!
LikeLike
My smallest quilt was 4 by 7. Cute little Christmas quilt with packages, trim and buttons.
LikeLike
My smallest quilt would be mug rugs I made for the gals I work with, small dresden flowers.
LikeLike
i made a small sample quilt for frontier days in grammer school
LikeLike
Brenda, Have you not been blogging or did I get taken off your list? Thanks, Cousin Mary
On Mon, Aug 6, 2018 at 10:06 AM The Quilting Nook wrote:
> Brenda posted: “Hello Everyone and welcome to the first month of the Save > the Bees BOM. Jacquelynne Steves has designed another fabulous free block > of the month this year. If you want to join in and haven’t signed up yet, > visit Jacquelynne here. Jacquelynne emails the in” >
LikeLike
The smallest quilt I’ve made was mug rugs for Christmas presents. I plan on trying my hand at making small quilts for wall decor.
LikeLike