
Hello Everyone! Today I get to share my finished “I Love Home” quilt from Jacquelynne Steve’s Block of the Month. You can find the finishing instructions here. I also listed this quilt as a finish for the 2017 Finish-A-Long. You can find my list here. This month’s prize is a $25 gift certificate for Thermoweb products. They are the makers of Heatnbond fusible webbing. I used Heatnbond Light in all the applique for this quilt. You can find out how to win at the bottom of this post.
Now that business is taken care of, let’s get on to the finished quilt.

I am so happy with this quilt. I love the design, the colors and the quilting. This was such a fun quilt to make with its hand appliqued houses with some touches of embroidery added to them. The piecing was easy and I learned how to make half rectangle units. Because “Home” will be a wall quilt I didn’t add the top and bottom borders. Otherwise, I kept Jacquelynne’s original border design except to make the middle border scrappy.
To make the scrappy middle border, I picked 6 color groups, then selected 4 fabrics from each group. You need a total of 48 prints and 48 solids to complete the border. Instead of cutting each square individually, I strip pieced the prints with the cream (you only need a 6″ strip of each or a charm square). From each strip set, you’ll get 2 units, two of each print. You’ll need to save two prints and two solids to sew to the ends of each border individually. Sew the units together to get your scrappy border.
I used Bella Ivory for the sashing and the solid squares in the middle border. The inside and outside borders are from Lulu Lane by Corey Yoder, which is also the frame for the house blocks. The fabrics in the blocks are from Chestnut Street and Coney Island by Fig Tree and Co. and Sundrops by Corey Yoder. All fabrics are Moda.
Now for the quilting, one of my favorite parts.
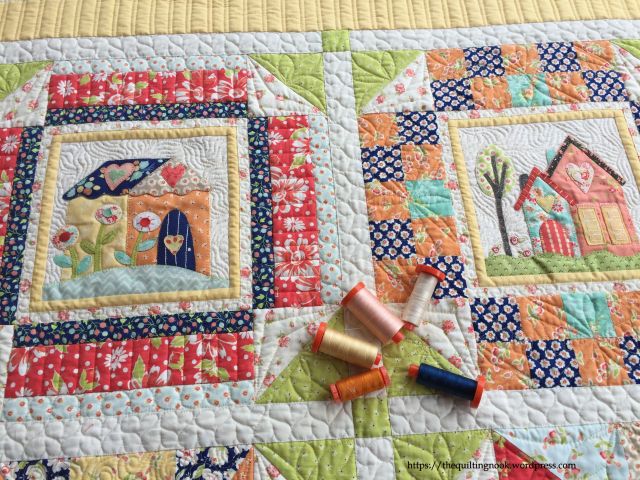
I used Aurifil 50 wt thread for all my quilting and two layers of Quilter’s Dream Select for the batting. All the quilting was done on my domestic Pfaff Quilt Expression 4.0 by me. I stabilized the quilt using So Fine Bottom Line thread, a fine thread, in the top and bobbin. I used my open toe spring motion foot to stitch in the ditch along all the sashing and house blocks. I find this much easier than using a walking foot so I’m not always turning the quilt. I left the border alone because I wasn’t sure how I was going to quilt it.
I quilted the house portions of the block all the same. First, I outlined all the major portions of the applique using a matching color. Then I quilted a McTavishing filler (created by Karen McTavish, a longarm quilter) in the background. To keep some consistency across the quilt, I stitched in the ditch for the yellow frame, then quilted a tiny swirl in the cream print frame. I also quilted all the block corner units the same. I got the idea for the quilted heart sashing from Lori Kennedy of the The Inbox Jaunt, one of Jacquelynne’s featured bloggers. I’ve been following Lori’s blog for years and have learned a lot from her quilting technics. I’ve used a few of her quilting ideas on my quilts in the past, especially for sashing.

To determine how I was going to quilt each block and the border, I used the coloring sheets again. This was a great way to sketch out my ideas and see how they would look on the quilt. I quilted two of the blocks just as I sketched them, one changed slightly and the other one changed completely. Here they are:


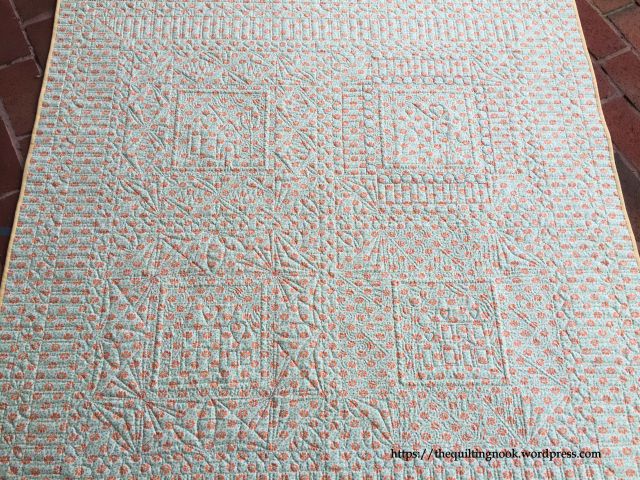
This last block was the one that I changed completely. I was going to do continuous curves in the squares, but after deciding I was going to that in the border, I changed my mind. I quilted diamonds and curves, which looks good on the back, but it’s hard to see them on the front.
As for the border, you can tell from the sketch, I had a hard time deciding what I wanted to do. I finally decided on the continuous curve, but when I pulled the quilt out and looked at it, I realized the middle and outer border were not the same size, so another change was needed.

From the beginning, I wanted to quilt flowers in the border. I finally decided to quilt a tiny flower in the solid squares, a continuous curve variation in the print squares and piano keys on the inner and outer border. I marked registration lines and centers in the middle border squares with a purple disappearing pen. To make the quilting flow better, I came up with a quilting plan to so I didn’t have to backtrack over my quilting.

I quilted the middle border about halfway down the border, leaving the flower and half the curve section incomplete, then I quilted back up and finished the designs on the way. Next I quilted the outside border using my ruler foot and a ruler, then quilted back up for the inner border. This worked out well. I could have done the entire border at one time, but I found it easier moving half the quilt at a time. I am very pleased with borders, even though they are not “perfect”.
Now for the giveaway!

For your chance to win a $25 gift certificate from Thermoweb, leave a comment on this post by Sunday, December 10 by 11:59 PM, and tell me if you plan to make gifts this year and if you’ve started them. I have a few small things in mind, but haven’t started anything yet!
Be sure to visit all the bloggers for additional chances to win
- The Crafty Quilter
- The Inbox Jaunt
- Designs by Sarah J
- Farmhouse Quilts
- Penguin and Fish
- Podunk Pretties
- The Quilting Nook
- The Sewing Loft
Don’t forget to post pictures of your Home quilt at the following places:
I would like to thank Jacquelynne for allowing me to be part of this Block of the Month. I had a lot of fun making the quilt and love her designs. I also want to thank her for the goodies I recently received in the mail:
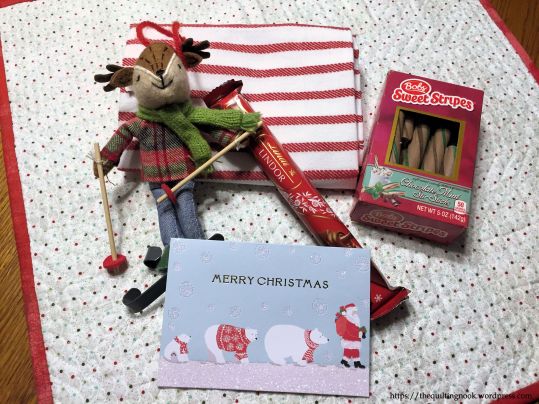
I’ve already been looking at applique designs to put on the dish towel. The chocolate bar was delish, but I need to get some fresh hot chocolate mix, (mine was a little hard) for the stir sticks. My son ate one just out of the box though.
I would also like to thank each of you who have checked in each month to see the progress on my Home quilt. I hope I was able to give you some new ideas on adding extras to your quilt. I hope you’ll keep checking in from time to time to see what progress I’ve been making on all my projects.


Made a few, but have run out of time.
LikeLike
Have recently moved and my focus now is home decor but will try to make some gifts if I have any extra time to do so.
LikeLike
Have made curtains for our new grandson’s room, and am working on matching outfits for our granddaughter and her doll. Quilting is next on the list!
LikeLike
I am making a few gifts this year; some are finished, some are still in progress!
LikeLike
I’m not making any gifts this year, it makes me sad but I just ran out of time..
LikeLike
I am always making sewing or quilting gifts for family, friends & loved ones, year round, but, December is definitely my busiest sewing month! Lots of warm things in the works: slippers, blankets, & comfort items, spa boots & mitts & things, all with lovely holiday colors!
LikeLike
Have so many ideas for handmade gifts, so little time left to make😫
LikeLike
This is gorgeous! I really love the quilting – great finish! On behalf of the FAL hosts, thank you for joining us!
LikeLike
Pingback: Hello 2018! | The Quilting Nook
Pingback: Some Travel Fun | The Quilting Nook